Monday 5 December 2011

Thift store fabrics

I love vintage fabrics.  Going to thrifts stores to look for these treasures are one of my favourite things to do (along with looking for vintage pyrex).  It's more than just vintage sheets though, there is a lot of unused fabric...from quilting cottons, flannels, apparel to home decor.  Here are a few of my recent finds:
 I think this one is so cool.  Here are a few closeups of these chic ladies:


My plan is to use it to make a large beach bag so that it showcases the print, which is very large scale.

I love the hilarious monkeys in this one:
I think this guy is my favourite:
The selvage says it's "Monkey Toile" by C.E. Tausch.  I was curious about the age of the fabric and the designer but a quick google search didn't get me anywhere.

Modern designer fabrics are great, but I like adding some more unique (and inexpensive) pieces to my stash as well. :)

Friday 2 December 2011

Another finish...I'm on a roll

With the motivation of knowing that I had a gift exchange with my work friends booked for today, I finished up another project.  Here is my version of a crayon/toy portfolio:
This is the front.  I added an initial to personlize it.  I added some sew in interfacing (aka a layer of some spare flannel and canvas) and quilted it (with my new walking foot!) to add some sturdiness to the cover.  I made a crayon portfolio before with canvas for the outside and cotton for the lining without any interfacing before but found it to be too flimsey looking.

Instead of doing a velcro enclosure, which I wasn't sure would keep things from falling out, I used a thick elastic that wrapped around to the back, as shown above.
Here's the inside (sorry, don't know why this pic turned out so horrible even though I took it at the same time with the same lighting), I made bigger gussetted pockets on the left for cars or other little toys and smaller gussetted pockets on the right for crayons with a pocket to hold a notepad in the middle.  I made it more complicated than the tutorials I've seen but I didn't want flat (non-gussetted) pockets because the cover would show bumps/bulges once you put anything in the pockets.  I had originally planned to add an extra flap to cover the crayons so that any fabric marked by the crayons would be hidden, but I was running out of time so I left that out.

I'm really happy with how it turned out and will need to make one for my little guy too (except with the extra flap to cover the crayons).

Wednesday 30 November 2011

My first WIP Wednesday

Since it's almost December and I need motivation to get through my very long home made gifts list, I've decided to participate in WIP Wednesdays at Freshly Pierced. 

Partially done:

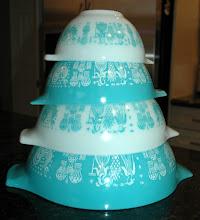
1) Vintage sheets quilt - I'm done most of the quilting, just need to finish that and bind it.

2) sleep sack - just needs some bias tape around the arm and neck holes.

Not even started:

1) e-reader case and earbud case for my hubby
2) tablet case and camera strap for my dad
3) project bag and knitting needles case for my mom
4) stocking and rice therapy bag for my nephew
5) crayon/car caddy for my co-worker's son
6) zipper pouches and eye masks for my MIL, SIL, aunt, best friends & nanny
7) buttercup purse for my friend's daughter

Ok, I'll stop there for now and only add more projects as I get some of these done.

Here's to hoping I will get more accomplished this year than previous years because I'll be tracking my progress every week.

Tuesday 29 November 2011

One gift down, a gazillion to go

I am a part of a gift exchange for work.  Since the co-worker whose named I drew is also a mom to an active toddler, I decided on a relaxation theme.  Of course, I had to include something handmade.  Being short on time, I needed something quick and easy.  I had some minky scraps left from the infant carseat canopy I made and I recently bought a scrap pack online that included some beautiful Joel Dewberry fabric.  I quickly whipped up this eye mask using this prudent baby tutorial:

I wish I had a dark coloured elastic, but I just used what I had on hand.  The tutorial was great but I would add that it is important to make sure that the placement of the elastic matches on either side (i.e. fold mask in half width-wise to compare).  The marking on the pattern for the elastic placement is not exact.  I eye-balled the placement within the markings and the elastic ended up being half inch higher on one side than the other (ugh!).  Of course I only noticed this after I finished top stitching (double ugh) so I had to dig out the elastic on one side and move it so it is a bit wonky there but it is not terribly noticeable (I hope).  I still love the way it turned out.  The minky side is so soft and the cotton side is great for when the weather is warmer.  Now I just have to get some bubble bath and some wine.

I will probably be making a few more of these masks for gifts, since they use up scraps and are super cute.  It feels good to be able to tick one item off of the long list of gifts I plan on making...hope this gives me some momentum since Dec. 1 is just a day away (yikes)!

It's not easy to be a crafty blogger!

I don't know how all those amazing bloggers out there do it!  They craft, they take great pictures of the process and end product, they blog about it and they read/comment on other people's blogs.  Meanwhile, I'm lucky if I finish any projects.  And when I do finish anything (like an infant carseat canopy and matching seatbelt covers this past weekend), I forget to take any pictures and then it's too late because they've been gifted already.  *sigh*

Tuesday 15 November 2011

A fun and quick project

I've been wanting to try this great tutorial for a drawstring bag after seeing all the cute bags others have made using it.  I finally did the other day and here is the result:
The tutorial was great, super easy to follow.  I will probably adjust the dimensions next time so I can make a bigger one, but otherwise, I was really happy with it.  It's currenlty holding a change of clothes for my little guy.

Fabric confessions

I am a full blown fabric hoarder.  I can't turn down cheap thrifted fabric.  Plus, I work across the street from a fabric store.  They often have great fabric in their remnant bin!  Like these Robert Kaufman fabric for $2 or less a yard:
How am I supposed to resist?

But things have gotten progressively worse...hours of reading sewing blogs has now gotten me hooked on the really good stuff...the expensive stuff:

Echino

Heather Ross:


I guess I really have to get sewing to use up all this fabric goodness!

Sunday 6 November 2011

Hand made baby gifts

Didn't get much sewing done this week.  Working on my vintage sheets quilt but haven't gotten too far. 

I did make a few things for a friend who recently had a baby.  An appliqued (fleece) moustache onesie:
And a wet bag (handy to keep in diaper bag for soiled baby clothes while you're out!):


I think I'll probably make another onesie and a few bibs to add to the package I"m sending her. 

I'm never sure about giving handmade gifts to people, but I believe this particular friend will like it and appreciate that I put effort into it.  :)

Wednesday 26 October 2011

crafty catch-up

Boy, my crafty blog is not off to a very good start.  It's been weeks since I've posted but I definitely have been sewing.  My favourite finish is this toddler purse and wallet I made for our friend's daughter's second birthday that just past (but the party is this weekend):
I based the bag on some ruffle purses I saw online but made the dimensions appropriate for a 2 year old and added a buckle and adjustable strap so that it will grow with her.  I love how the ruffle on the purse turned out!  The wallet  has a zipper compartment on the back and a snap for the front flap (sorry about the terrible picture but it was dark when I finished it).  So cute, I'll definitely make more of these.

My other big finish I'm not so proud of, except for the fact that i"m finally done.  It's my second baby quilt for Project Linus.  I hadsome vintage flowery fabrics laying round that I wasn't a big fan of, but I figured it would be good for a girly quilt.  I planned to do pinwheels but I really didn't like how it looked so I used the HSTs for traditional zig zag pattern.


I really regret using that horrible peachy coloured solid fabric I happened to have and really wanted to use up.  A nice pink or white would have been so much better I think.  Oh well.  At least it's done.  I was in such a hurry to get it over with I machine bound it.  I prefer the back because you see the zig zag quilting.

Now I really need to get started on my christmas projects!!!

Wednesday 28 September 2011

My first finish! :)

Here it is...my first finished quilt ever. 
And here is the pierced back:
I kept it super simple and quilted in the ditch along the zig zags.  It's not perfect but I"m happy with it and I'm so excited to donate it to Linus Project  :)

Hopefully it is just the first of many to come.

Monday 12 September 2011

My first quilt top!

Lately, I've completely fallen head over heels for quilting, which I had never tried before.  There are so many wonderful blogs showing all the beautiful quilts that people are making. 

I wanted to start off with something small.  My baby doesn't really need another blanket, but there are lots of kids out there that do so I decided I wanted make a crib sized quilt for charity.  I did a little digging and found out that there is a local chapter of Project Linus in my city and contacted the coordinator to make sure what I made would fit into their requirements.  I used a bunch of flannel in my stash (which I got super cheap at a couple of yard sales) and a free online tutorial for a super easy zig zag pattern, which I thought would be appropriate for a Peanuts themed charity.  Here my first quilt top ever:
I can't say that I enjoyed the cutting part very much.  I actualy changed the pattern and did diagnal zig zags because it required less blocks/cutting.  I need to get a decent cutting mat and ruler so that it will be a lot more painless next time.  The ruler I ordered online but I"m waiting for a decent sale for a mat.  I definitely had sticker shock when I saw that a mid-sized mat at the fabric store is about $50.  I've been trying to find one second hand but really doubt I'll find one that way. 

The piercing part went quite smoothly.  The floral flannel is a bit thinner than the solid ones so it moved/stretched a bit when I sewed so those seamed didn't line up perfectly.  It certainly helped that there are very few seams that need to be lined up perfectly for this pattern!   

Since my flannel fabric is not wide enough, my next step is to pierce the back...then it's onto basting, quilting and binding!

Friday 9 September 2011

In the beginning

Here we go, my first post on my new blog!  Since my mom has sewed and knitted most of her life, I learned to do so as well very early on.  I remember knitting and sewing clothes for my dolls when I was 5 or 6.  However, my love of sewing really took off when I got pregnant a few years ago.  I spent hours everyday making things for the little one growing inside me.  I guess it was my version of "nesting".  :)  Ever since then, I have loved looking through all the different amazing blogs about sewing and finding great ideas and tutorials I've put to good use.  To make it more fun, I thought I'd join in all the blogging fun!